Repair and restoration of retro consoles, 8 bit computers. In this blog I hope to show you how to repair, retrore and modify old consoles and handhelds, from manufacturers such as Atari Amstrad Acorn Sinclair Commodore Dragon Sony MSX BBC Playstation Sega Microsoft xbox Spectrum ZX81 Vic 20 VIC20 C64 Amiga Binatone Grandstand.
Apologies for the delay with this entry; varied reasons include school holidays, two birthdays and some minor repairs of some retro console birthday gifts! Please feel free to use my PCB and 3D printed housing designs found on my Github and Thingiverse should you wish to make your own joystick adapter. Here is the TI994a working with the FlashRom99 and my Joystick Adapter circuit. Here are all the components required for this mod. The gerber files for my PCB design can be found on my Github. https://github.com/Alleged-Geek/TI99-4a-Joystick-Adapter/ And you are looking for the zip file named below if you are going to send the gerber file off to be manufactured. ti99-4a-adapter_2022-07-27.zip My github also contains stl files for printing the housing. And here is my version of the schematic diagram. You will need 10 X IN4148 signal diodes which can be found on eBay. 1 X DB9 D-SUB 9 Pin Female connector, again found on eBay. 2 X DB9 D-SUB 9 Pin Male connector al...
Get link
Facebook
X
Pinterest
Email
Other Apps
Grandstand TVG 3600 Rust, Repair and Restoration
Restoring a
rusty old battery acid covered Grandstand TVG 3600
Hi all,
this entry is all about a restoration of a 1978 Grandstand TVG 3600. I bought
it on Ebay knowing that it was a little under the weather. The seller even
stated that he didn’t think that it worked and was sold as sales or repair. He even
went to the bother of highlighting the various problems with the classic
console. He further explained that he used to restore old consoles but couldn’t
be bothered! Fair play to his for being brutally honest; I got this machine for
the princely sum of £15 including delivery. It even had its original box and
one half of the polyester packing (with a battery acid rust stain all over it)
It arrived in good time and
this is what I received through the post.
Lets have a
look at the condition of the console!
Oh dear! Look
at the left hand side of the aluminium label; below is a close up picture of it
I have
never seen Aluminium in such a bad way! It usually takes an eternity to corrode
like this; I still cant think what caused this to happen. My biggest concern
here was what would I be able to do with it!
It also
looks like the previous owner had tried to hide the corrosion by using a silver
marker; this obviously didn’t work for them ;o) I am in no way implying that
the seller did this to the console as he was very open and honest with his
listing.
Lets take a
look inside it now
Here is a
picture of the controller storage compartment.
Nice,
housing for the two controllers and the RF lead. There is even a notch for the
RF lead to stick out of the console when in use. I was quite pleased with the
build quality… so far!
However, I did notice a
couple of things looking at this picture; Rust and Rust! The screw which
secures the Battery Terminals cover was red with rust and both screws on the
controller were rusty. I would have to do something about that!
Let's have a
proper look at the controllers.
Starting
with the paddle controllers.
Rust on
both screws as found in the earlier photo.
I tested the control knobs
and there was good movement; however after testing them with a multimeter I found
that the resistance increase or decrease in a steady manner when turning the
knob.
Now
let’s have a look at the light gun
Again, rust
on every screw!
I would
have to do something about this!
I actually
dreaded the next part; what was I going to find in the battery compartment!
I turned
the machine over and opened it up.
What a mess
of rust and acid. On a safety note; it is best to wear gloves whilst attempting
to do anything with this kind of rust as it is a mixture of rust and battery
acid. It will burn you upon contact with skin. It is probably wise to wear
protective glasses as well. It is usually quite easy to spot battery acid rust
as opposed to normal rust as like in this case, the rust looks moist. Normal
rust is usually drier and brighter in colour.
Now to open
up the console; there are four main screws, two can be found in the battery
compartment and two on the base of the console
the bottom
should simply lift off at this point; carefully turn it over so that we can
remove the loudspeaker and power wiring.
The speaker
is secured by a single screw and a holding clip; there is also a fabric disk
which prevents dust/moisture getting into the console through the holes on the
casing for the speaker.
Now we need
to remove the orange and black wires from the battery terminals. Unfortunately
for me, the screw had rusted so badly that no matter which screwdriver I used,
I couldn’t remove the screw for the battery terminal cover.
Time for
plan B!
As
there was no moving the screw, I decided to drill the head off it. Care should
be taken doing this as it is very easy to break the case when drilling. As I don’t
have a pillar drill at home, I turned to my trusty 20 year old power drill.
Try and
ensure that you hold the drill as straight on the screw head as possible; the
good thing about cross head screws is that the drill centres pretty well on the
middle of the screw.
When
drilling, try not to push too hard on the drill as this could actually try and
screw the fixing screw in deeper with an added side effect of damaging the case
or screw boss. Let the drill do most of the work.
You will
know when the head of the screw is drilled off as you will feel it through the
drill and you should see movement on the plastic terminal cover. After that, the
cover should simply lift off.
Use a pair
of gripped pliers to unscrew what is left of the fixing screw
Now we need
to remove the wires from the battery terminals; this takes quite a bit of heat
so if you can crank up the temperature of your soldering iron that would be
great, if not, you will have to leave the soldering iron on the terminal for a prolonged
time before the terminal is warm enough to melt the solder. As you can see on
the video, I ended up putting on fresh solder before the solder would melt
enough to remove the wires.
Next up is
the power jack socket; now I have to admit to having trouble with this one. The
locking screw sits almost flush on the side of the console which made it
extremely difficult to remove. I used pliers on the jack socket on the inside
of the console and a pair if very fine pliers to lock the two grooves on the
locking screw on the outside of the console. A word of warning... This is very
fiddly
Now that
the bottom part is free, we need to disassemble the top part; for some reason
my recording of this failed so I have opened up the console again to show you
how its done.
Remove the
two highlighted screws
carefully
lift the board up at the right hand side over to the left hand side (like
opening a door)
Remove the
five small screws then lift off the switch PCB; As this was a post restoration
picture, you will notice yellow wires connecting the switch board to the main
board. This was because the original connector strip had lost its backing and
the thin wire connectors had snapped off in a couple of locations (see below
picture)
Once the
switch board has been removed, you will see the switch board contact and
switches; it is worth taking note of how they are positioned on the top panel.
Pretty
disgusting; they will need a good clean before reassembly.
The next
part of the restoration was to remove the rust from the battery terminals; I
opted to use electrolysis rust removal again (like I did for the VIC 20
restoration) and try to nickel plate them afterwards.
I wasn’t holding
out too much hope for this though as the springs were looking very corroded and
felt pretty fragile!
To save
time, I soldered each part together with a couple of pieces of wire then placed
it im my electrolysis container, turned on the power and waited! There was a
huge amount of rust to remove and it took longer than the VIC 20 (I even had to
change the solution a couple of times as it was looking pretty disgusting)
Whilst the electrolysis
was doing its magic, I decided to clean the case of the console; This was not
an easy task as the rusty battery acid was absolutely everywhere!
I started
with Mrs Geek’s trusty toothbrush
But that didn’t
want to shift the orange stains so I then tried to scrape it off with a wooden
skewer
Although
that did help a little bit, there was still no shifting of the rust, so I tried
again with a foam scouring pad.
then the
toothbrush again!
No matter
what, I couldn’t completely remove the rust; then a brainwave hit me; a lightbulb abovemy head moment! It was so
simple, in fact too easy! I decided to try WD40! And although it was horrible
to clean afterwards, it did remove most of the rust and left me with a case
that I was happy to reassemble! (see pictures of reassembly)
Happy with
the console case, I then turned my attention to the electronics. Everything
looked greasy and grimy; there was the problem with the switch board
connections to the main board and I still had to check the capacitors and look
for any suspect solder joints. This was going to take a whole lot of Isopropyl
Alcohol to clean!
After much
scrubbing with Mrs Geeks spare toothbrush, Isopropyl Alcohol and tidying up with
Isopropyl Alcohol and cotton buds, I had a the main PCB looking like this…
Beautiful.
I checked
the soldering and components and remarkably there were no signs of any damage!
I then
cleaned the component side; again looking for any signs of trouble with the
components
Again,
looking good with no real signs of any damage!
Now I had
to repair the wiring from the switch board to the main board. Firstly, I
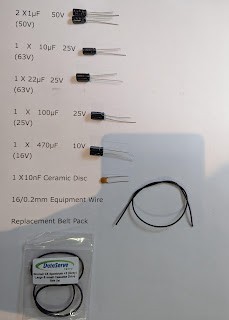
desoldered the old connection wires, I then cut nine strips of 40mm long 7/0.2mm yellow equipment wire.
I then Stripped
both ends about 5mm
Next, I
twisted the ends of each wire
Then I
tinned each end
Finally I
soldered them on to the main board as I felt that it would be easier to solder
the short and awkward wires on to the smaller PCB. Below is a picture of the
result.
Next up
were the switches; they were looking pretty horrible, but after a clean with
Isopropyl Alcohol and cotton buds, they looked pretty good! I refitted them to
the top panel (ensuring that I locked each switch in place as shown in the
picture below)
Now it was
time to partially reassemble the console; I still had the aluminium faceplate
to worry about! What was I going to do about that! There was absolutely no way
of repairing the original faceplate. I screwed the switch board back on to the
lid of the TVG 3600.
I then
screwed the mainboard to the lid using the original screws
then I
replaced the now nickel plated battery terminals to the bottom half of the
console; I was pleasantly surprised by the finish given the original state of
the terminals (I may replace them with new terminals in the future though as
one of the springs didn’t survive the electrolysis!)
I then
soldered the orange and black wires on to the terminals, refitted the insulating
cover (using a new screw. After that I refitted the power jack socket and
speaker (remembering to place the circular dust filter beforehand)
I then
turned my attention to the faceplate.
Here is a
picture of the removed damaged faceplate
I thought
long and hard about this; a very long time ago (and I mean about 30 years ago)
I experimented with Aluminium labelling which involved designing an artwork,
exposing some aluminium coated with a special UV sensitive layer to a UV light
source, then use a special etching dye to colour the unexposed area of the
aluminium after washing off the unexposed areas with water. But try as I might;
I couldn’t find anything out in the market for this any more… pity as it would
have been ideal! So it was time for plan B… I purchased some silver adhesive laser
printer paper from Ebay. I have to admit to being slightly underwhelmed when
the paper turned up; it was no where near as shiny as I would have liked but I
decided that I should give it a go anyway.
After much
measuring and a whole lot of patience and test prints, I finally found a font I
was happy with and an accurate outline for the label. If you require a copy of
my Microsoft Publisher file then please feel free to get in touch.
and this is
what it looks like once it is all stuck together; on a wee side note, I had to add
three layers of adhesive laminating paper below the silver label as the texture
of the lid was visible on the label when stuck down.
now it was
time to screw the case together then get working on the controllers.
Now let’s
have a look at the controllers; I mentioned that the paddle controllers were a
wee bit jittery when controlling the bats on screen. I tested them with a
multimeter and found that the change in resistance was jumping about a fair bit
when turning the knob of the controller so I opened them up and had a look
inside.
Remove the
knob and screw
I then
removed the lid of the controller and had a look inside
I then
stripped down the Pot completely
then
inspected and cleaned the carbon trace and metal runners of the shaft with
Isopropyl Alcohol.
As you can
see, there is a wee bit of damage done to the carbon trace at about 10oClock on
the pot; I put everything back together again and retested. This time I was
getting sensible readings on my mutimeter, hopefully this would improve the
accuracy of the bat on screen. If not, I will replace the 500k Pot with a new one.
Now lets
have a look at the gun controller; As I do not have a CRT TV there is
absolutely no way I will get this working here in Geek Mansion, but the OCD in
me required me to restore it anyway… just for completions sake!
Time to
open it up; most of the screws had rust on them so they will need to be
replaced.
Firstly the
lens has to be removed, this simply slides off, then there are four screws to
remove which I have highlighted below
Inside the
gun is very simple; there is a switch which is activated by the trigger and the
LDR is wired to the switch board as well. The trigger slides off and the spring
can be gently lifted off the boss. The Electronics should simply lift out of their
slots inside the gun.
I
gave the gun a wash in soapy water, dried it off completely then reassembled
it.
Time
to put it all back together, using new screws.
The new
screws looked a little out of place so I decided to paint them with some of my modelling
paint. The black was easy, I just added a wee bit of isopropyl alcohol to thin
it out and carefully dabbed the heads of the screws until they were all
covered.
The screw
on the brown handle was a wee bit more problematic and I had to mix a lighter
brown with some black until I was happy with the colour.
And here we
have a beautiful looking controller!
Time to set everything up
and test!
I switched
it on…
And…
…
Everything
Worked!
This wee
console was probably the worst example of battery acid corrosion I have ever
seen on any of my old systems. I think I replaced almost every screw with new
ones and even had to drill one out as it was in such poor condition. I would
like to thank the seller on Ebay for being so honest about the console; I truly
had so much fun working on it!
You can
find a video clip of this restoration by clicking on the youtube link below.
I hope that
you have enjoyed this entry and as always, if you have any questions/comments
or feedback them please do not hesitate to get in touch


Comments
Post a Comment