Repair and restoration of retro consoles, 8 bit computers. In this blog I hope to show you how to repair, retrore and modify old consoles and handhelds, from manufacturers such as Atari Amstrad Acorn Sinclair Commodore Dragon Sony MSX BBC Playstation Sega Microsoft xbox Spectrum ZX81 Vic 20 VIC20 C64 Amiga Binatone Grandstand.
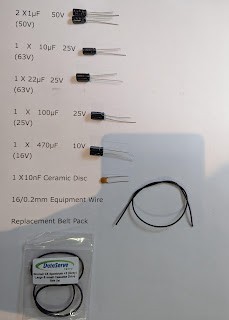
Apologies for the delay with this entry; varied reasons include school holidays, two birthdays and some minor repairs of some retro console birthday gifts! Please feel free to use my PCB and 3D printed housing designs found on my Github and Thingiverse should you wish to make your own joystick adapter. Here is the TI994a working with the FlashRom99 and my Joystick Adapter circuit. Here are all the components required for this mod. The gerber files for my PCB design can be found on my Github. https://github.com/Alleged-Geek/TI99-4a-Joystick-Adapter/ And you are looking for the zip file named below if you are going to send the gerber file off to be manufactured. ti99-4a-adapter_2022-07-27.zip My github also contains stl files for printing the housing. And here is my version of the schematic diagram. You will need 10 X IN4148 signal diodes which can be found on eBay. 1 X DB9 D-SUB 9 Pin Female connector, again found on eBay. 2 X DB9 D-SUB 9 Pin Male connector al...
Get link
Facebook
X
Pinterest
Email
Other Apps
ZX Spectrum +2 AY Sound Levelling Fix
Hi all, continuing with my ZX Spectrum +2
modifications, I decided that I would sort out the problems with the sound levelling
from the AY chip.
Obviously it will be hard to show you the actual fault
in text so I have included a Youtube clip at the end of this entry which will
feature the complete mod from start to finish step by step.
First of all let’s have a look at the schematic and I
will try and explain what each resistor does and how to modify the sound levels
from that.
Before I started this mod, I researched it online and
found a few variants but the one I thought would suit me best comes from JoulesperCoulomb,
a link to his youtube clip can be found here
He goes into great detail about the mod in his clip but
does not show the actual work being carried out.
Lets take a look at the sound circuitry on the
schematic.
I will start with the Audio
Out Socket circuitry first
I have highlighted R37 which is the AY output to the
Audio Output Socket. The problem is that using the SCART cable and the Audio
Out Socket, the AY noise level is far too low and if the volume of your TV is
low enough it is not even audible.
To fix this we are going to replace the 10KΩ resistor
with a 2K7Ω resistor. This should raise the sound level of the AY on the Audio
Out Socket.
The next component to be replaced is R45 (10kΩ) this
comes from the MIC output and is too high (well not too high in truth but the
level is still to high to cause an imbalance with the audio even after reducing
the resistance at R37)
Below the schematic shoes that R45 is connected to the
MIC pin of the ULA
To lower the level of the MIC output to the Audio Out
Socket we are going to increase the resistance to 33KΩ. Below is the updated schematic.
Doing this will result in the volume level from the
Audio Out Socket being reduced a little so you may find that you will have to
turn the volume up on your TV whilst using your Audio and SCART cable.
The final mod for the Audio Out Socket I am doing I had
to think long and hard about; this mod is to reduce the noise level from the
EAR output from the Data Recorder. The reason I had to think long and hard
about it was due to the fact that I rather like the iconic sound of a ZX
Spectrum loading software. However, I have to agree that the volume is a little
excessive so I decided to go ahead with it.
As before with the MIC output, the simple solution is
to increase the resistance at resistor R80. Below the schematic shows that it
is connected to the Audio Out Socket and through to pin 4 of the Cassette
connector via a 100nF capacitor and up to the EAR pin of the ULA.
From what I have read dramatically increasing this
resistance works best (anything between 220K and 330KΩ) I opted to go for the
middle value of 270KΩ as highlighted below.
Now let’s have a look at the RF Sound.
The RF sound levels were actually quite good but there was
a wee it of an imbalance during the AY test I carried out as the AY output was
a wee bit quieter. To correct this we need to know which resistor to adjust.
Looking at the schematic below we can see that R38 is
connected to the AY chip then on to the
Audio input pin of IC11 and then on to the MIC pin of the ULA.
As this was only a little bit out, we do not need to
adjust this as much as we did the MIC pin for the Audio Out socket so we only
need to reduce the value to 5K6Ω as shown below.
The
final resistor we need to look at is the one which comes from the EAR pin of
the ULA which is connected to pin 4 of the Cassette connector. I have highlighted
R60 below.
The volume of the tape loading in both the Audio Out
and RF is excessive and I decided to stick to the value I used for the Audio which
was 270kΩ.
Below is the updated schematic diagram.
Now with all the proposed resistor value changes
agreed, lets get to work on the +2!
For this
modification you will need the following tools.
Soldering Iron
De-Soldering tool
Cutters
Pliers
You will also need the following resistors
2K7Ω
5K6Ω
33KΩ
2 X 270KΩ
Below is a picture of the
resistors with their Schematic number and colour codes listed.
All of the above resistors can be found in the highlighted
section of the PCB as shown below.
Time to get working!
If you would like to test the sound levels before the
modification simply boot up the +2 into 128K Basic and type in the following
program
10 BEEP 0.7,0
20 PLAY “C”
30 GOTO 10
Then type run
Here is a picture of what the program will look like on
screen.
I tested this on both my SCART and RF output and
confirmed that the sound levels were indeed unbalanced.
Now to the actual modification!
First identify where R37 is on both the component side
and the solder side of the PCB.
As you can see here, R37 is not the value expected from
the schematic diagram; it should have been a 10KΩ but is in fact a 2K2Ω. I
could have left it as it was as it is close to the value I wanted but I decided
to change it to a 2K7Ω resistor as that value will match the 33KΩ resistor value
of R45.
Below is a picture of the location on the solder side
of the PCB which will help with the de-soldering of the component.
De-Solder R37
The easiest way to do this is to freshen up the solder
on the Via’s of R37; this simply involves adding fresh solder to the solder
joints of the resistors. Adding new solder and flux from the solder will make
the de-soldering process much, much easier.
Add fresh solder to the solder joints.
Then de-solder using your solder sucker or de-soldering
gun; I have to admit to preferring to use my trusty 20 year old solder sucker
for this process as I feel that I do not have the same control over the process
using an electric de-soldering tool; but that’s just me… I’m ancient and old
school ;o)
Then check that all the solder has been removed
completely from the Via’s as failing to do so could result in damaged traces
leading to and from the Vias of the PCB.
I found that one of the legs of R37 was still fixed to
the Via so I gently nudged the leg with my soldering iron until it became free
and then I simply pushed the leg through the PCB with my finger.
Now we need to pull the resistor from the PCB, I tried
my tweezers but because the factory had bent the legs of the resistors inwards
and at about 30° my tweezers didn’t have the strength or grip to pull the
resistor free. I ended up using my cheapest pair of pliers for this job as they
have a serrated edge which gives them more grip.
Now check that the Via’s are free from solder (this
will make placing the replacement resistor in a whole lot easier) If you find
ant obstructions in the via’s simply add fresh solder to the Via then de-solder
again. This should clear the hole for the resistor leg.
The replacement resistor for R37 is a 2k7Ω, its colour
code is Red, Purple, Red, Gold; check that you have the correct resistor before
soldering as it looks pretty similar to the 270KΩ resistor.
Bend the legs of the resistor with your pliers until
you have a staple shape.
Then fit the resistor flat against the component side
of the PCB; keep your finger on it whilst you bend the legs out 45° on the
solder side as this will prevent the resistor from falling when the PCB is
turned upside down for soldering.
Then solder the resistor; the idea here is to heat both
the resistor leg and the via at the same time until they are both warm enough
for the solder to melt on to both surfaces. Typically this will take about 3
seconds to heat up.
Then add the solder whilst keeping the soldering iron
on both the Via and resistor leg (try not to move the soldering iron at this
point) then wait another 3 seconds for the solder to flow through the Via to
the component side.
A wee side note here; some components have thicker legs
or pins and they will require more heat (length of time before soldering)
before you can solder.
Trim the legs of the resistor with your cutters; be
careful not to cut into the solder joint as this will weaken the joint and will
increase the risk of a dry solder joint in the future.
Now let’s replace R38, below is the location of the
resistor on the component side.
And here is its location on the solder side of the PCB.
De-solder the resistor and replace it with a 5k6Ω resistor,
again checking the colour codes before refitting (Green, Blue, Red, Gold).
This process is done in exactly the same way as
described earlier.
Check colour codes
Bend the legs to form a staple shape
Fit the resistor so that it is lying flat against the
component side of the PCB
Whilst keeping the resistor flat with your finger, bend
the legs of the resistor to about 45° on the solder side
Solder the resistor
Trim the legs
And this is what R37 and R38 should look like after
soldering.
Now let’s replace R45
Below is a picture of its location on the component
side of the PCB
And here is its location on the solder side (apologies
for the poor quality of this picture)
Follow the de-soldering and soldering procedure listed
above and replace the 10KΩ resistor with a 33KΩ resistor (Orange, Orange,
Orange, Gold) then you should have a PCB looking like this.
The next resistor I changed was R60; below is a picture
of the location on the component side.
And below is a picture of its location on the solder
side of the PCB.
De-solder the 68KΩ resistor and replace it with a 270KΩ
resistor (Red, Purple, Yellow, Gold) using the same process as before.
This resistor is a wee bit tricky to remove once
de-soldered as the ULA and keyboard membrane gets in the way of your fingers or
pliers. Take care not to push or bend the keyboard membrane connector as this
could easily damage the connector.
The same care should be taken when refitting the 270KΩ
resistor; be careful when pushing the resistor down flat on the component side
of the PCB.
Once soldered, you should have a PCB looking like this.
The final resistor we need to change is R80, below is a
picture of its location on the component side of the PCB.
And here is the location of R80 on the solder side of
the PCB.
The replacement value of this resistor is another 270KΩ
(Red, Purple, Yellow, Gold) de-solder the 10KΩ resistor and solder the new
resistor into place and you should have a PCB looking like this.
And that is the modification done; now refit your +2
and lets get to testing the system.
Set up the +2 as usual; I tested my SCART output first
which can be seen below.
I selected 128K BASIC and typed in the program as
before
10 BEEP 0.7,0
20 PLAY “C”
30 GOTO 10
Then typed
run
as seen in the picture
below.
The +2’s picture looks great with the SCART lead but it
also now sounds great! The two tones are now at the same volume… job done!
Now to try it with the RF output of the +2
Set up the +2 to display through the RF n your TV and
type in the same test program.
Success! Although the RF levels were pretty good to
begin with there has been an improvement!
Now to test the tape loading function; again I was a
little concerned about doing this mod as I kinda like the iconic sound of software
loading on ZX Spectrums.
Firstly here it is on the
SCART output.
Not bad at all; I fact I have to agree it does sound
better (and it’ll also please Mrs Geek who just ‘loves’ the sound of software
loading on my +2 ;o))
Lets have a look at it on the RF output.
Another success! I am really pleased with the sound
levels but look at that picture on the RF output! I will really have to do something
about that!
Well that is yet another modification done to my +2,
below is a Youtube clip showing the testing and modification from start to
finish.
Hopefully you will be able to hear the differences with
the sound levels pre and post modification.
Thank you very much for taking the time to read this
entry; I hope that you have found it useful.
If you have any queries or questions about this mod
then please feel free to leave a comment or email me at


Any ideas how to fix the Z70833 issue 4 black 128k +2 audio? I'm struggling to find the circuit diagram for this revision. cheers
ReplyDelete